Seeded Popovers Recipe
Popovers are the most delightful thing my oven produces - sky-high and billowy. Here's my go-to recipe, a few tips, and the overall technique I use.
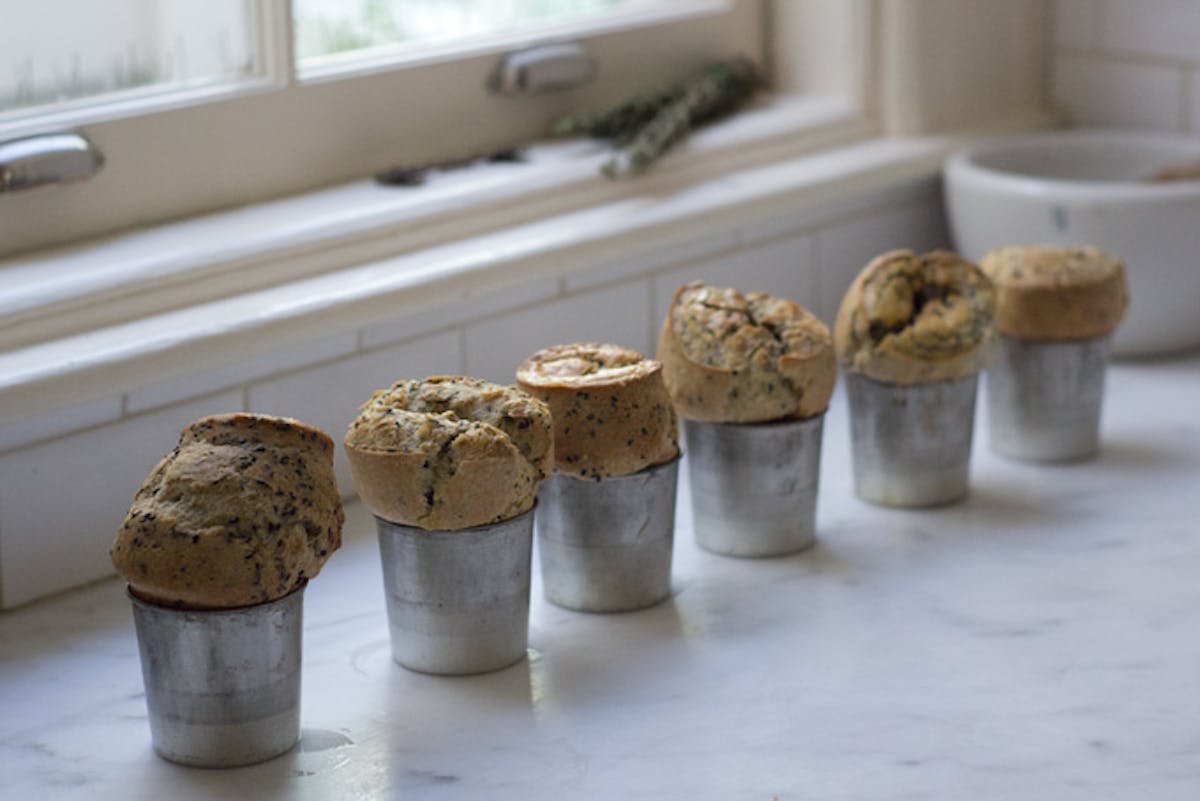
The most delightful thing my oven produces is the popover. Gougères are a close second, but the popover wins for sheer drama. They're golden-crusted bready crescendos made from the simplest ingredients. Their crunchy exterior belies a billowy eggy interior that absolutely begs for a slather of butter or honey. Popovers are worth learning to make well. Which, I'll be honest, takes a bit of practice. I've chipped away at this recipe over the years, and I suspect I'll continue, but I thought I'd put it out there today and encourage you to give them a go. I suspect some of you popover specialists out there have a thing or two to teach me as well.
I'm going to talk a bit about technique down below, but before you dive down the rabbit hole related to then endless number of popover techniques that are out there, you really want to make sure your oven is on point. You need to make sure you have even constant heat, and good control over temperature. You need a blast of heat in the beginning to get that upward push going, then a more gentle heat to cook the popovers through and to allow a beautiful crust to develop. Just know, while a bad run of popovers might not be pretty, they'll likely be tasty regardless.

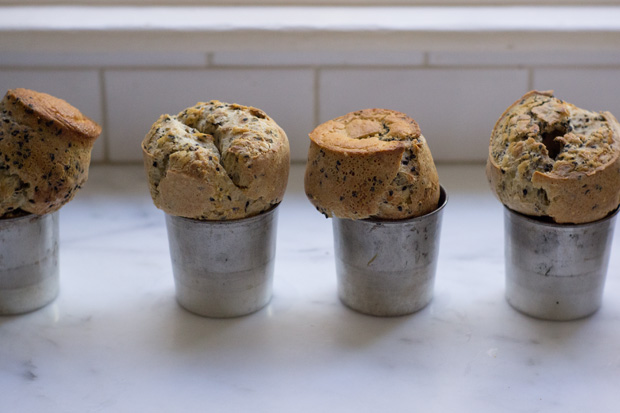
Before we get to the recipe, I'll mention that just about every variable related to making popovers is up for discussion - both related to the recipe and the technique. There is debate on what type of flour to use, baking powder vs. none, batter resting time, oven temperature, food processor vs. blender vs. mixer, preheating the baking tins or not......people are passionate. I'll tell you that I haven't had luck using bread flour or whole grain flours, too dense and heavy. I'm all ears though, if you've had luck. Some famous popover recipes use a much higher ratio of flour than I do here - I just never had any success with that. I fill my tins a hint over 1/2 full with batter, and get great pop. I've gone higher, but sometimes get spillover, particularly with an eggier batter. I've written a few tips into this recipe, from things I've learned the hard way - for example, it really is worth dirtying a pitcher and using that to quickly fill your pans. Bonne chance my friends - let me know how it goes.
Seeded Popovers
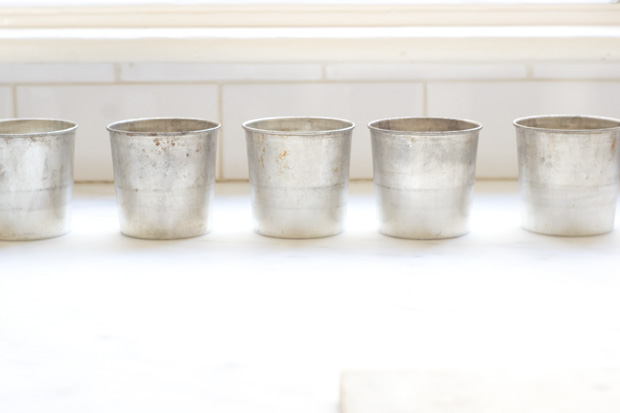
I use individual timbales here, but you can use a special popover pan, or muffin tin. Deep and narrow tins get great results, but muffin tins deliver the delight as well.
2 cups / 475 ml whole milk
2 tablespoons unsalted butter
2 cups / 9 ounces / 255 g unbleached all-purpose flour
1 1/4 teaspoons fine grain sea salt
3/4 teaspoon baking powder
1/4 cup / 1.5 oz / 45 g raw, uncooked millet seeds*
2 tablespoons / .5 oz / 15 g toasted sesame seeds*
2 tablespoons / .5 oz / 15 g toasted sunflower seeds*
5 large eggs, room temperature(!)
Start by preheating your oven to 425F / 220C, with a rack in the low-center. If you're using popover or muffin pans, grease them, I like to use clarified butter. If you're using individual timbales (like I did), do the same. Place the tins on a baking sheet, preferably rimmed.
Place the milk and butter in a medium saucepan and gently heat until it is warm to the touch, not more than 115F/45C - you don't want to scramble the eggs down the line. Remove from heat.
Sift the flour, salt, and baking powder into a large bowl. Stir in the millet, sesame seeds, and sunflower seeds. Set aside.
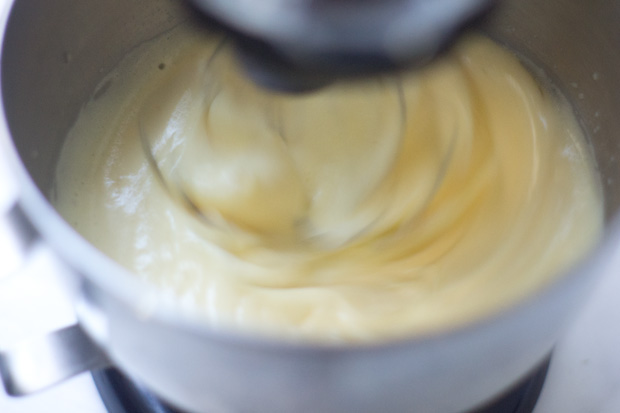
Now you're going to whisk the eggs. It's important to start with room-temperature eggs here, using an electric mixer with the whisk attachment at medium-high speed. It'll take a couple of minutes, but you want the eggs to get nice and voluminous, light, and take on the color of yellow taffy (see photo up above). Dial back the mixer speed, and add the milk in a slow, steady stream. Gradually add the flour mixture a bit at a time, and whisk for another 60 seconds. Transfer to a pitcher.
Preheat the empty popover pans in the oven for five minutes. Quickly, but carefully, remove them (you don't want to let all the heat from the oven), and fill each tin 1/2 full with batter, maybe a tad more. If you're using muffin pans, fill every other hole, to give room for the popover. Transfer to the hot oven carefully (but quickly!), and dial back the heat to 400F. Bake for 30-45 minutes. I hate to give exact times here, I really go by sight. Without opening the oven look for deep golden coloring on all sides, and lots of airy lift. Bake as long as you can without letting the tops get too dark, if you let them bake on the long side, you'll end up with more structure, which helps keep your popovers puffed when they come out of the oven. When golden, remove, turn out onto a cooling rack, and enjoy as soon as possible.
Makes 6-8 large popovers, or more smaller ones..
*If you opt out of the seeds, you're back to the basic popover recipe. Feel free to swap in chopped dried or fresh herbs, grated cheese, spices, zests, etc.
Prep time: 65 minutes - Cook time: 50 minutes


Comments are closed.
Apologies, comments are closed.
Comments
Love the way your popovers pop over so nicely! Something about them that just gets the appetite going.
Caz, it is funny you say that. My mom makes these, but calls the Yorkshire Puddings and she got the recipe from my father's British family. I thought they were 'quintessentially UK'!
I love the crunch of millet in baked goods, ever since I made your millet muffins with honey + lemon! Thanks for another great use for millet :)
Lovely! My favorite way to cook these is using small terra cotta pots! Friends always love the look--me too. This is not an original idea, but I thought I'd pass it along!
My daughters love gluten-free popovers (we just sub in a gf flour blend)... I never thought of adding anything to them (although I have seen cheese versions). Knowing my kids I think they would prefer chocolate chips! (But I would like the seed version.)
I've made popovers once before but have A LOT to learn! these look incredible!
Never baked a popover in my life. I do like a good challenge though. Will I be up to the task? I guess I'll need to give it a go in order to establish this
These look gorgeous. I have to make these. I just bought all the seeds. :)
Caz - they're yorkshire puddings!!! These do look scrummy. They're also good with a spoon of wholegrain mustard in the mix. Yum!!
Sure enough I just found a recipe that emphasizes not to beat the eggs too much. As in: hardly at all. I see many popover-trials in my future ...
I love your photographs! these popovers look delicious!
I love how you seriously get a huge POP with your popovers. Those babies are poppin' right out! And I love the little tins you made them in. I have always contemplated investing in a popover pan but they're so clunky and take up so much room! Something like this, just to stack in the cupboard is just so much smarter! Where did you get the timbales as you call them?
I absolutely LOVE popovers and am so excited to try your recipe because of the addition of the different types of seeds. YUM!
Oh my goodness, these popovers look just AMAZING! I have always envied people who make popovers, maybe now I will finally attempt them! Thank you :)
Growing up in a Jewish household there was never a shortage of popovers at family dinners but I have never seen a popover that is so beautiful to look at! The addition of seeds gets rids of the visual monotony that most popovers are known for and makes them much more appealing. I think how the food looks plays such a big role in if you are inclined to eat it at all! I also love the timbales. Very much your style!
These popovers look so impressive and I love how you include seeds and millet too. Popovers aren't something we have in the UK so it's all new to me. As a gluten free person it might be a bit of a challenge but I can apreciate how lovely they look. :)
Where do you get those timbales? I'm beyond frustrated with the non-stick popover pans that are only as good as the coating lasts. Restaurant supply or??? Looking forward to exploring your recipe. I've made them successfully using a simpler approach of just throwing together the ingredients quickly at any old temperature, but the results are not 100% consistent. But yes, always tasty.
How fun do these look all lined up in a row? It seems as though everyone has been baking lately! I'm seeing all the blogs go through a bread recipe, but this one is by far the most professional looking! I'm going to have to make these for my next fancy dinner, but practice before so I don't pop too much over. :)
This is so, so helpful! I've never made popovers before for the same reason I've never made a souffle - I'm intimidated by the "finicky-ness" of the recipe. Thanks for breaking it down in a way that makes it easy to understand! I'm looking forward to attempting this soon :)
Oh my goodness, these popovers look just AMAZING! I have always envied people who make popovers, maybe now I will finally attempt them! Thank you :)
Comments are closed.
Apologies, comments are closed.